In this document, you will understand how to publish content in studio using the hosting services that you have created. To learn about publishing content on Kapost Cloud, refer to Publish and Unpublish Content on Kapost Cloud.
- Go to the content you want to publish and make sure that a primary destination is added to the content type.
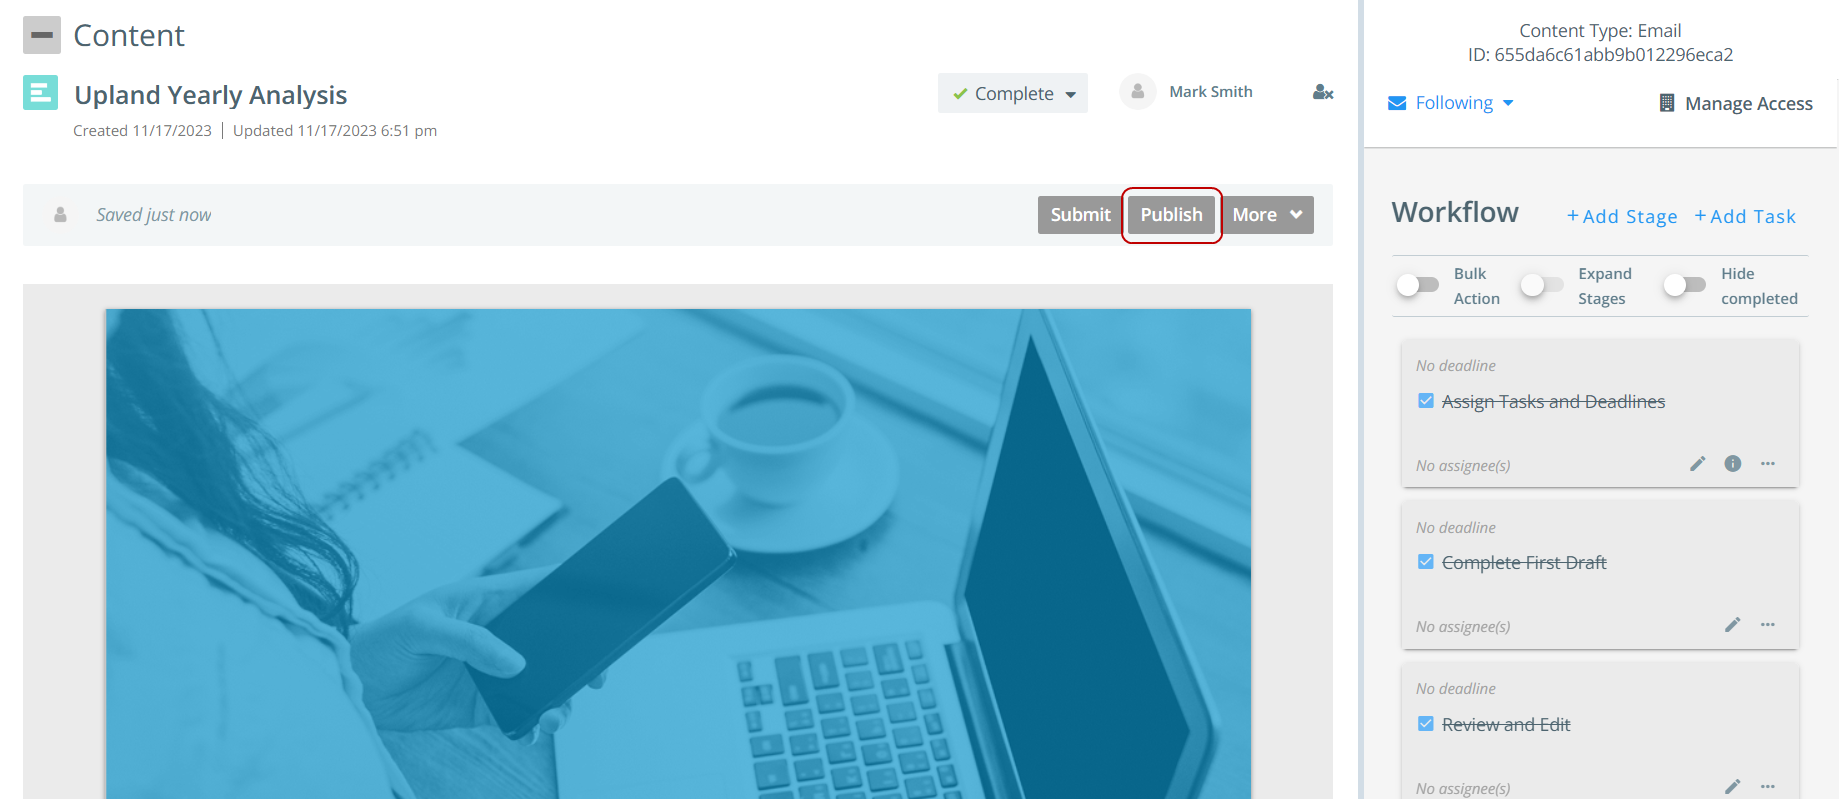
- Once the document is ready to be published, Click Publish.
- Select where you want to publish the document from the Publish to drop-down menu.
Tip: You can select Kapost Cloud if you want Kapost to host your document.
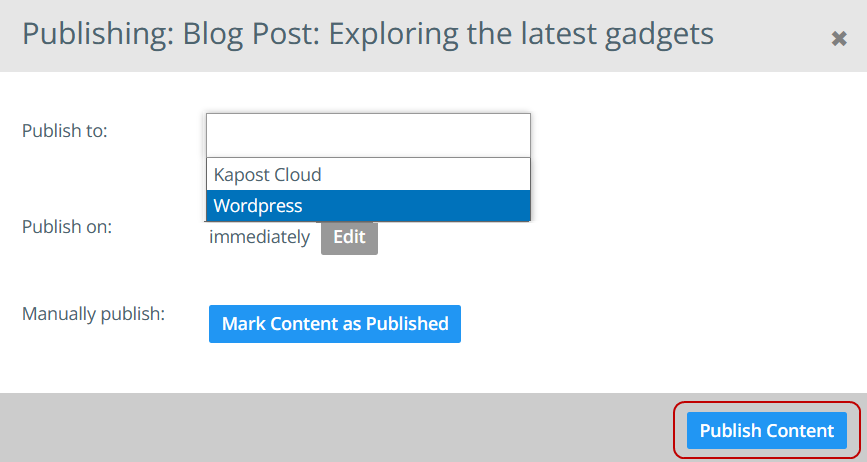
- Once the selection is made, click on Publish Content.
- Once it is published, we will generate a tracking URL that wraps the published URL you see in Kapost. You can then include this tracking URL on your landing pages, or anywhere else you would like to give people access to your document.
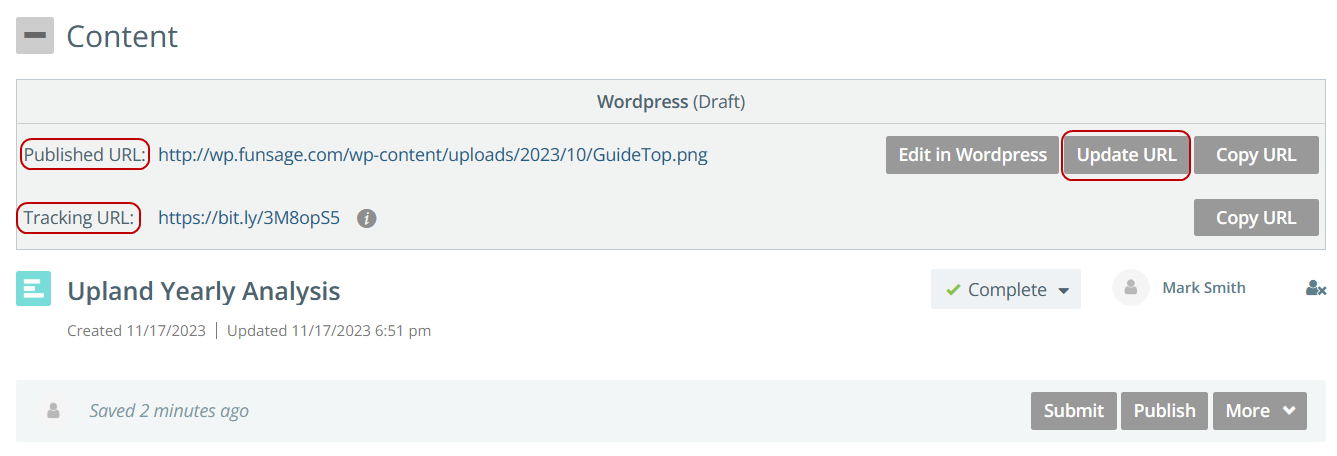
- To update or change the document, upload the latest version to Kapost (using the same file name as the old one) and republish that version to the original destination. The tracking URL and published URL will not change but will now point to the latest version. You will no longer need to update links in Kapost or on your landing pages.
- To change the document URL, you can manually update it using the Update URL button. This will automatically generate a new bit.ly link.
Note:
-
You can Unpublish documents only from Kapost Cloud.
-
The Update URL button is not available if the documents are published to Kapost Cloud.
-
Clicks on Published URL are logged within the Member Activity page.